
1、背景
在 Cloudreve 系统中,已经添加了 aria2 的 web 端。然而,目前 Cloudreve 并未内建 Aria2 服务端。为了解决这个问题,我考虑在 Cloudreve 的镜像中直接集成 Aria2 Server。这一构想促成了本文的撰写,旨在探讨如何在 Cloudreve 环境中成功构建并整合 Aria2 Server。
2、运行Cloudreve官方容器。
创建映射文件。
cd / && mkdir cloudreve \
&& mkdir -vp cloudreve/{uploads,avatar} \
&& touch cloudreve/conf.ini \
&& touch cloudreve/cloudreve.db
添加容器。
docker run \
  -d \
  --name='Cloudreve' \
  --net='br1' \
  --restart=always \
  --mount type=bind,source=/cloudreve/conf.ini,target=/cloudreve/conf.ini \
  --mount type=bind,source=/cloudreve/cloudreve.db,target=/cloudreve/cloudreve.db \
  -v /cloudreve/uploads:/cloudreve/uploads \
  -v /cloudreve/avatar:/cloudreve/avatar \
  --ip='192.168.1.159' \
  -e TZ="Asia/Shanghai" \
  -e HOST_OS="Unraid" \
  -e HOST_HOSTNAME="cenyuio" \
  -e HOST_CONTAINERNAME="Cloudreve" \
  -l net.unraid.docker.managed=dockerman \
  -l net.unraid.docker.webui='http://[IP]:[PORT:5212]' \
  -l net.unraid.docker.icon='' \
  'cloudreve/cloudreve:latest'
3、构建Aria2
进入容器中。
docker exec -it Cloudreve /bin/sh修改依赖源vi /etc/apk/repositories,以提升依赖安装速度。
http://mirrors.aliyun.com/alpine/latest-stable/main
http://mirrors.aliyun.com/alpine/latest-stable/community安装依赖之前需要先更新apk update。
apk add --no-cache \
  g++ \
  libxml2-dev \
  cppunit \
  autoconf \
  automake \
  libtool \
  make \
  cmake \
  libssh2-dev \
  c-ares-dev \
  zlib-dev \
  sqlite-dev \
  pkgconfig \
  gpgme-dev \
  gmp \
  cppunit-dev \
  libssh2 \
  zlib \
  sqlite \
  pkgconf \
  libressl-dev \
  gnutls-dev \
  nettle-dev \
  gmp-dev \
  libgpg-error-dev \
  libgcrypt-dev
获取Aria2。
cd / && mkdir Aria2 \
&& cd Aria2 \
&& mkdir build \
&& cd build \
&& wget https://github.com/aria2/aria2/releases/download/release-1.37.0/aria2-1.37.0.tar.gz \
&& tar -zxvf aria2-1.37.0.tar.gz \
&& cd aria2-1.37.0
开始构建Aria2。
./configure --with-openssl
make
make install
4、创建Aria2运行脚本
创建aria2.conf aria2.session 文件。
cd /Aria2
mkdir Downloads
touch aria2.conf
touch aria2.session
vi aria2.conf 编写配置文件,Esc + :wq 保存并退出,注意要替换掉your_secret_token 密钥,以便连接Aria2 RPC。
# Set the download directory
dir=/Aria2/Downloads

# Enable RPC service for controlling aria2 via RPC
enable-rpc=true
rpc-listen-all=true
rpc-secret=your_secret_token

# Set the maximum number of concurrent downloads
max-concurrent-downloads=5

# Enable resuming downloads
continue=true

# Set the global maximum download speed (0 means unlimited)
max-overall-download-limit=0

# Set the maximum download speed per task (0 means unlimited)
max-download-limit=0

# Set the global maximum upload speed (0 means unlimited)
max-overall-upload-limit=0

# Set the maximum upload speed per task (0 means unlimited)
max-upload-limit=0

# Enable file segmentation for faster downloads
split=5

# Checksum support (may be required for BitTorrent, etc.)
# checksum=true

# Enable HTTPS support
# Note: Requires TLS support during build, depending on system and build options
# For example, you can use --with-openssl or --with-gnutls
# https-proxy=https://your-proxy-server:port

# Set User-Agent
user-agent=Mozilla/5.0 (Windows NT 10.0; Win64; x64) AppleWebKit/537.36 (KHTML, like Gecko) Chrome/91.0.4472.124 Safari/537.36

# Allow continuing downloading partially downloaded files from HTTP servers
allow-overwrite=true

# Save download history to a file
save-session=/Aria2/aria2.session
input-file=/Aria2/aria2.session

# When saving or loading a download session, only add new tasks without replacing existing ones
save-session-interval=60

# Enable Metalink support
# Requires libxml2-dev or libexpat1-dev (depending on the system)
# Depends on the options used during aria2 build
# metalink=true
vi aria2-start.sh 编写运行脚本,Esc + :wq 保存并退出。
#!/bin/sh
# Start aria2c service with specified configuration and logging options

# Define the path to aria2c, configuration file, and log file
ARIA2C_PATH="/usr/local/bin/aria2c"
ARIA2_CONF="/Aria2/aria2.conf"
ARIA2_LOG="/Aria2/aria2.log"

# Check if aria2c is executable
if [ ! -x "$ARIA2C_PATH" ]; then
    echo "aria2c not found at $ARIA2C_PATH"
    exit 1
fi

# Check if the configuration file exists
if [ ! -f "$ARIA2_CONF" ]; then
    echo "aria2 configuration file not found at $ARIA2_CONF"
    exit 1
fi

# Start aria2c with the specified options
$ARIA2C_PATH --conf-path=$ARIA2_CONF --disable-ipv6 --log=$ARIA2_LOG --log-level=debug

# NOTE: If you want to run aria2c in the background, use nohup or consider creating a system service.
# Example using nohup:
nohup ./start_aria2.sh > /dev/null 2>&1 &将其改成可执行文件chmod +x aria2-start.sh 。
运行Aria2./aria2-start.sh 。

5、构建成新的Docker 镜像。
vi /etc/init.d/start.sh创建全局启动脚本,并将其改成可执行文件chmod +x /etc/init.d/start.sh 。
#!/bin/sh
/cloudreve/cloudreve && /Aria2/aria2-start.sh
导出cloudreve容器的文件系统。
cd /cloudreve && mkdir docker_image && cd docker_image
docker ps # 查询cloudreve容器ID
docker export 容器ID > ./cloudreve_aria2.tar
创建新镜像。
docker import ./cloudreve_aria2.tar cloudreve_aria2:cloudreve版本号-aria2版本号
#例如 cloudreve_aria2:v3.8.3-v1.37.0
创建Dockerfile文件。
FROM cloudreve_aria2:cloudreve版本号-aria2版本号
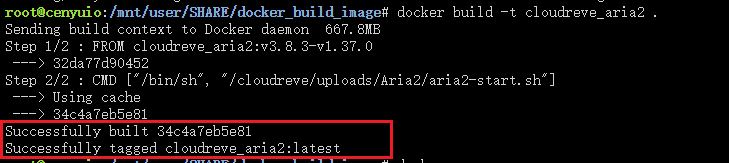
CMD ["/bin/sh", "/etc/init.d/start.sh"]开始构建Docker镜像。
docker build -t cloudreve_aria2 .构建成功。
 6、运行构建后的镜像
初始化配置文件。
docker stop Cloudreve && docker rm Cloudreve \
cd / && rm -rf cloudreve && mkdir cloudreve \
&& mkdir -vp cloudreve/{uploads,avatar} \
&& touch cloudreve/conf.ini \
&& touch cloudreve/cloudreve.db
运行容器。
docker run \
  -d \
  --name='Cloudreve_aria2' \
  --net='br1' \
  --restart=always \
  --mount type=bind,source=/cloudreve/conf.ini,target=/cloudreve/conf.ini \
  --mount type=bind,source=/cloudreve/cloudreve.db,target=/cloudreve/cloudreve.db \
  -v /cloudreve/uploads:/cloudreve/uploads \
  -v /cloudreve/avatar:/cloudreve/avatar \
  --ip='192.168.1.159' \
  -e TZ="Asia/Shanghai" \
  -e HOST_OS="Unraid" \
  -e HOST_HOSTNAME="cenyuio" \
  -e HOST_CONTAINERNAME="Cloudreve_aria2" \
  -l net.unraid.docker.managed=dockerman \
  -l net.unraid.docker.webui='http://[IP]:[PORT:5212]' \
  -l net.unraid.docker.icon='' \
  'cloudreve_aria2:latest'